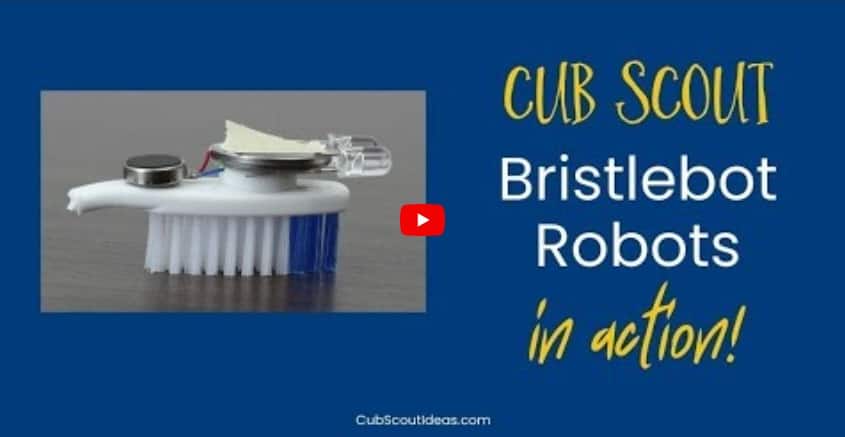
Learn how to make super cool Cub Scout robots! They're easy, inexpensive, and perfect for the Bear Robotics adventure. No soldering needed!
As I searched for an inexpensive way for the Scouts to build a robot, I found many tutorials for building bristle bots, but they all required soldering the wires.
At first, only the Bears were going to make these, but my friend Betsy said she thought that all of the Cub Scouts would enjoy making them.
And she was right! I can't imagine how distraught the other kids would have been if they couldn't participate in our Cub Scout robotics session.
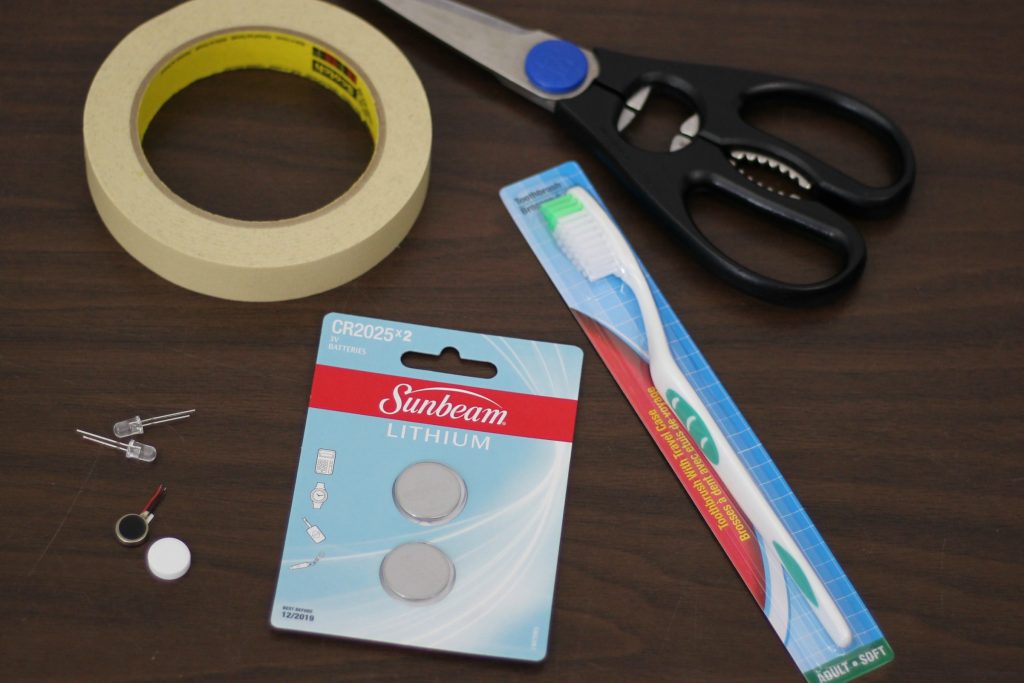
Toothbrush
3 volt coin battery
10 mm coin cell phone or pager motor on Amazon or eBay
2 – 3 mm flashing LED bulbs
Double-sided adhesive foam circles
Painter's or Masking Tape
The toothbrushes need to have bristles that are flat rather than angled. The angled ones will tip over.
The toothbrush heads need to be fairly wide so that the foam pad and the motor will both fit.
These are the motors that I purchased from Amazon. They're also available from eBay. One important caution about ordering from eBay: Many of the suppliers are based in China or Hong Kong, and the orders may take several weeks to arrive.
PREPARATION FOR MAKING ROBOTS
Prior to the meeting where you're making bristle bots, you'll need to do two things.
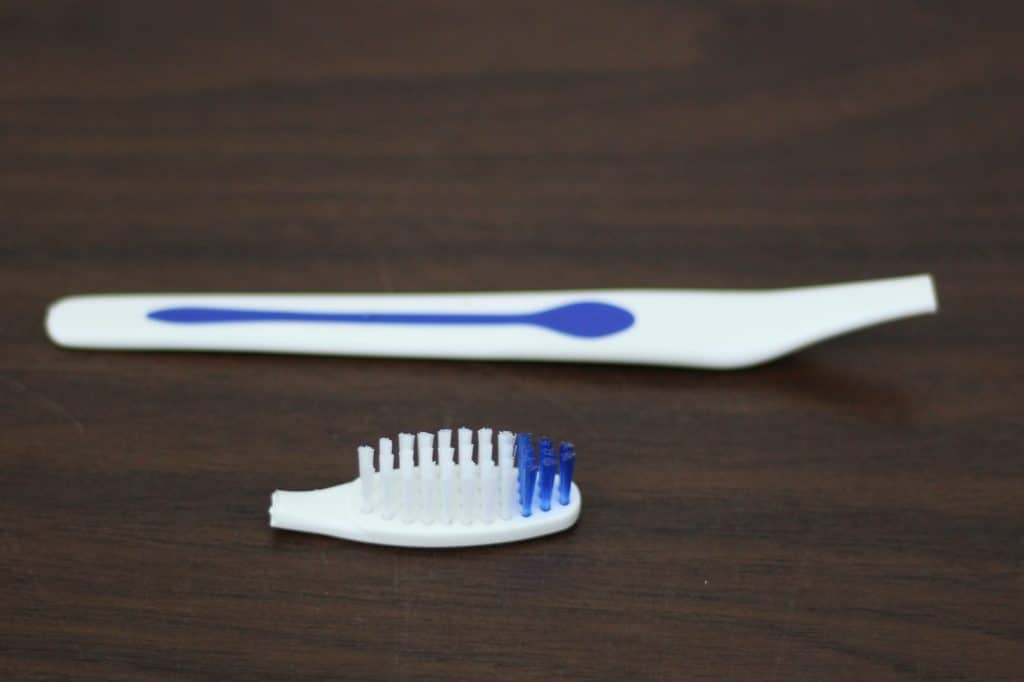
First, cut the heads off of the toothbrushes. They aren't as difficult to cut as I first thought. They can be cut with kitchen shears or wire cutters. Anything a bit more heavy duty than regular scissors would work.
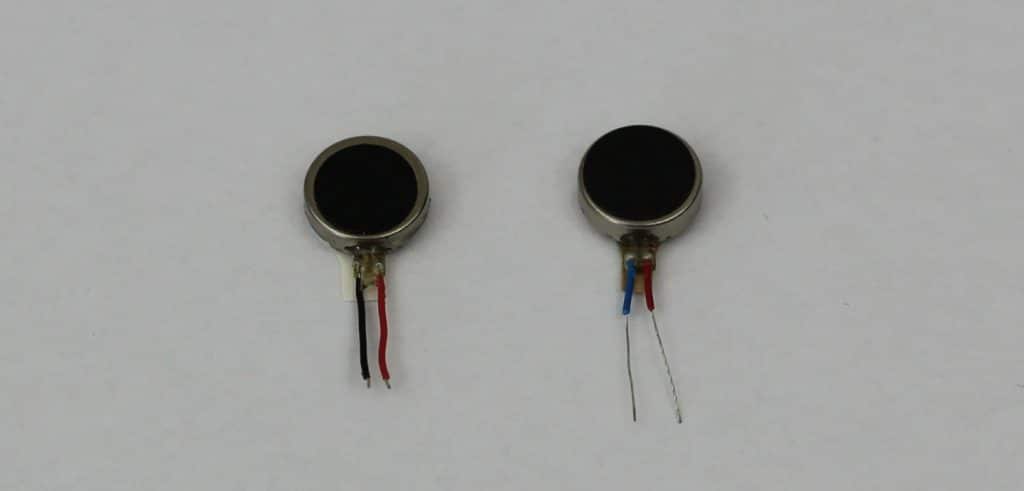 The wires on the motor on the right have already been stripped.
Second, you need to strip some of the plastic covering from the wires on the cell phone motor. The ones I bought for my prototype and the ones we bought for camp only had a small amount of wire showing. It wasn't enough to make contact with the battery.
To me, this was the hardest part. None of our wire strippers were small enough for the job, so I tried carefully cutting around the wire with a craft knife and gently pulling it off. I cut the wire completely off a few times as I was trying to get the hang of it.
Luckily, one of our volunteers figured out a better process and cut all 200+ of them for camp.
First, he held the wires closest to the motor with pliers. He then rubbed a serrated knife gently across the top of wires then flipped the motor over and did the same thing on the bottom. Finally, he used tweezers to pull the plastic off.
We put all of the supplies for one robot into a plastic baggie to make it easier to distribute them at camp.
DISCUSSION PRIOR TO BUILDING THE ROBOTS
Before we began assembling the robots, I asked the Scouts if their parents ever put their mobile phone on vibrate and explained that the little motors in their packages are what makes the phone vibrate.
I explained that the wires on the motor needed to be handled gently and carefully to avoid breaking them.
I asked the Cub Scouts what would happen if they put batteries into their game controller the wrong way to start a discussion about the positive and negative sides of the battery. We talked about the positive and negative wires on the motor.
We talked about the LED bulbs, and I showed them that the positive wire “leg” is longer than then negative wire.
ASSEMBLY OF THE CUB SCOUT ROBOTS
Here are the steps we took to assemble our Cub Scout robots.
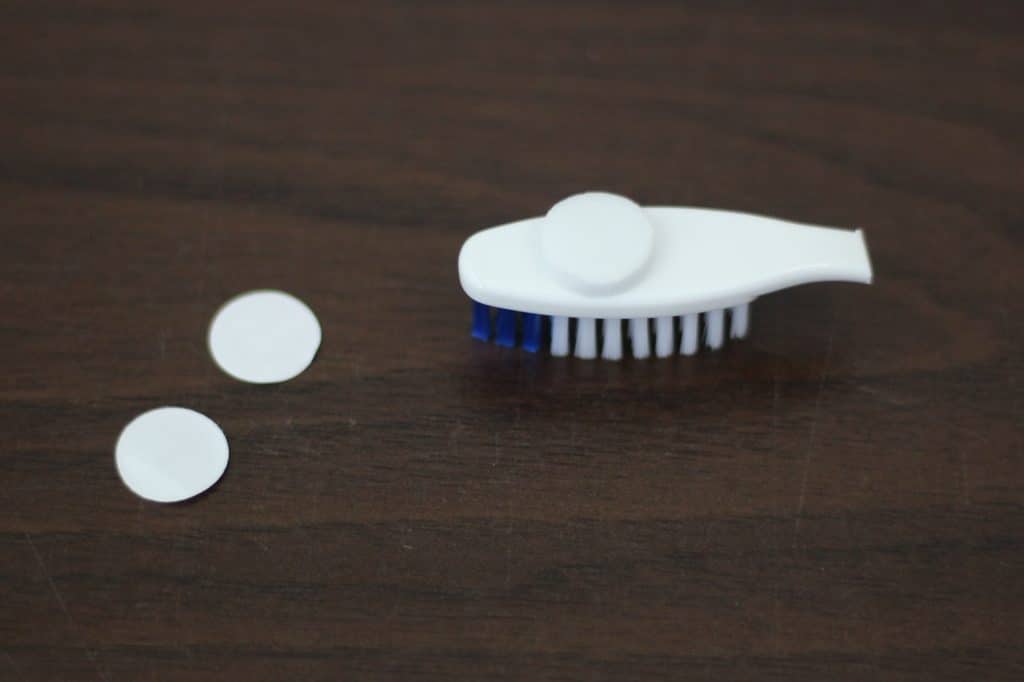
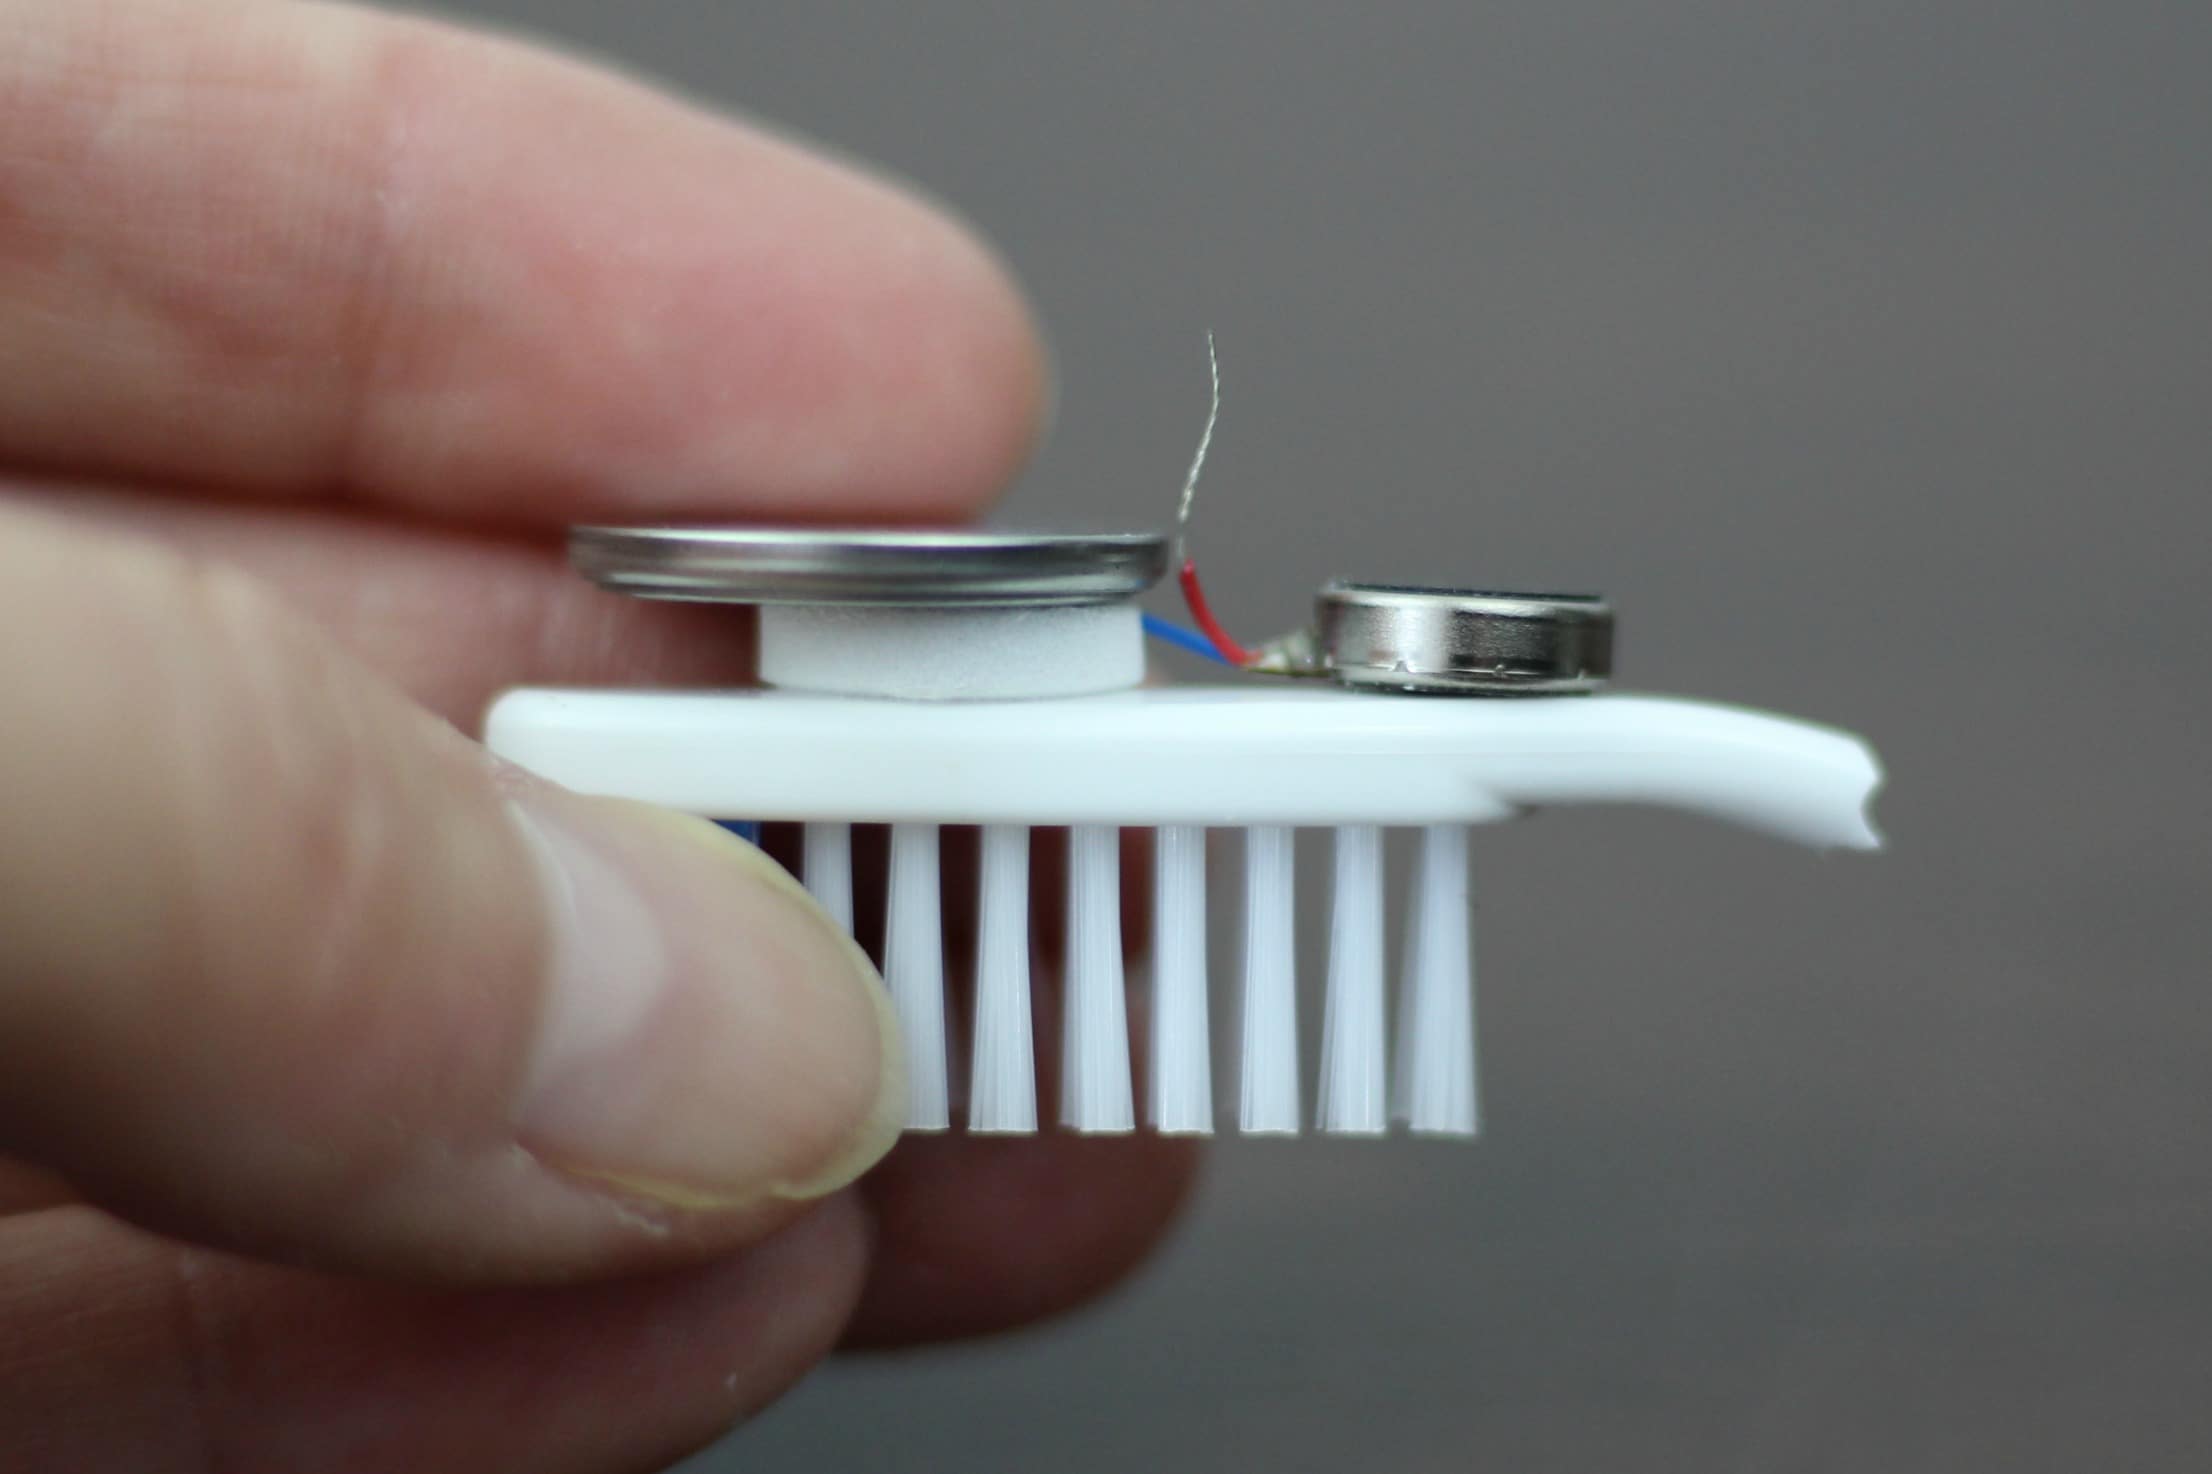
1. Peel the backing from one side of adhesive foam pad and stick it onto toothbrush. It should be toward the end of toothbrush back opposite of where the handle was.

2. Peel the backing from the motor and stick it onto the back of toothbrush (where the handle was) with the wires facing the foam pad.
3. Separate the wires. Bend the positive wire up and gently press the negative wire onto the top of the adhesive pad.
Our motors had the usual positive red wire, but the negative wire was blue rather than the typical black.

4. Place the battery on top of the adhesive pad with the positive side up. Depending on how close the red wire is to the top of the battery, some of the Cubs will feel their robots vibrating. They get so excited about this!
The kids whose robots aren't vibrating get a little worried when their buddy's is. So, I quickly explained that all they need to do is to make the red wire touch the top of the battery.
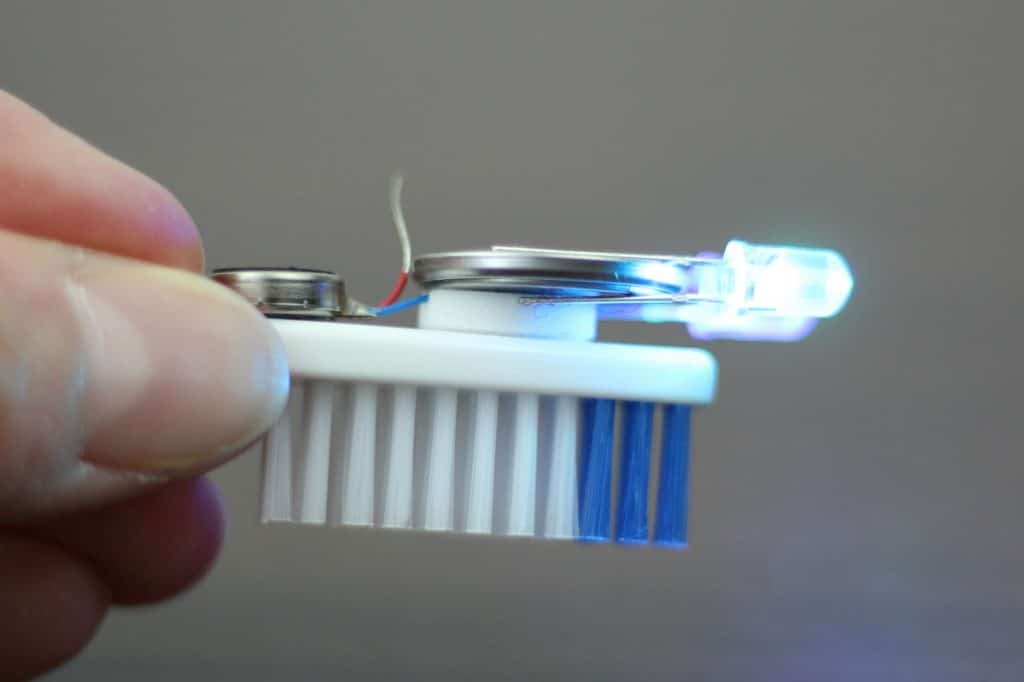
5. To add the “eyes”, slide the LED bulbs onto the sides of the battery with the bulbs at the front of the toothbrush (the opposite side from the motor). The short “legs” (negative side) should be on the bottom.
6. Using painter’s or masking tape, tape the positive wire down onto the battery, and watch the robot go!
When the Scouts are finished playing with their Cub Scout robots, remove the LED bulbs. Remove the tape, and bend the red wire up.
Place the tape back onto the battery so that the red wire can’t touch it. This will keep the battery from running down.
We had them put the robots into the baggies that held the supplies. This made it easier to take them home.
PLAYING WITH THE BRISTLEBOTS
It really doesn't take long to assemble the Cub Scout robots, so we knew they would have time to play with them. The Scouts had a few options, thanks to the wonderful Boy Scout volunteers who were assisting me!

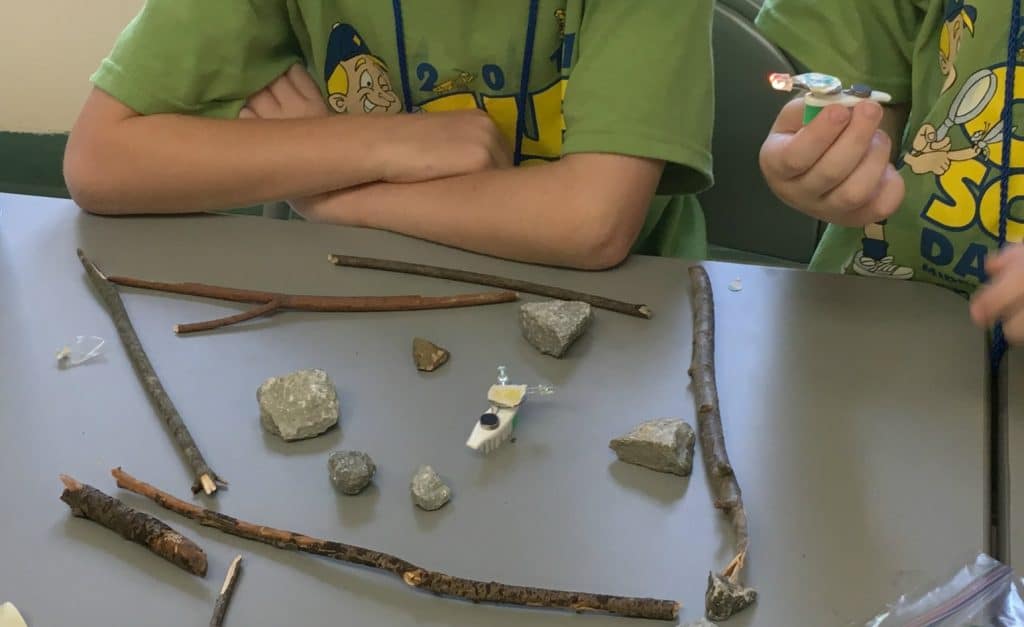
Originally, we were just going to give them some sticks to build a “battle arena” for the bristle bots and some rocks to use as obstacles. They could pair up and battle each other in the small tabletop arena.
But Jamie, Eli, and J.B. (the Boy Scouts helping me) came up with two other great ideas!
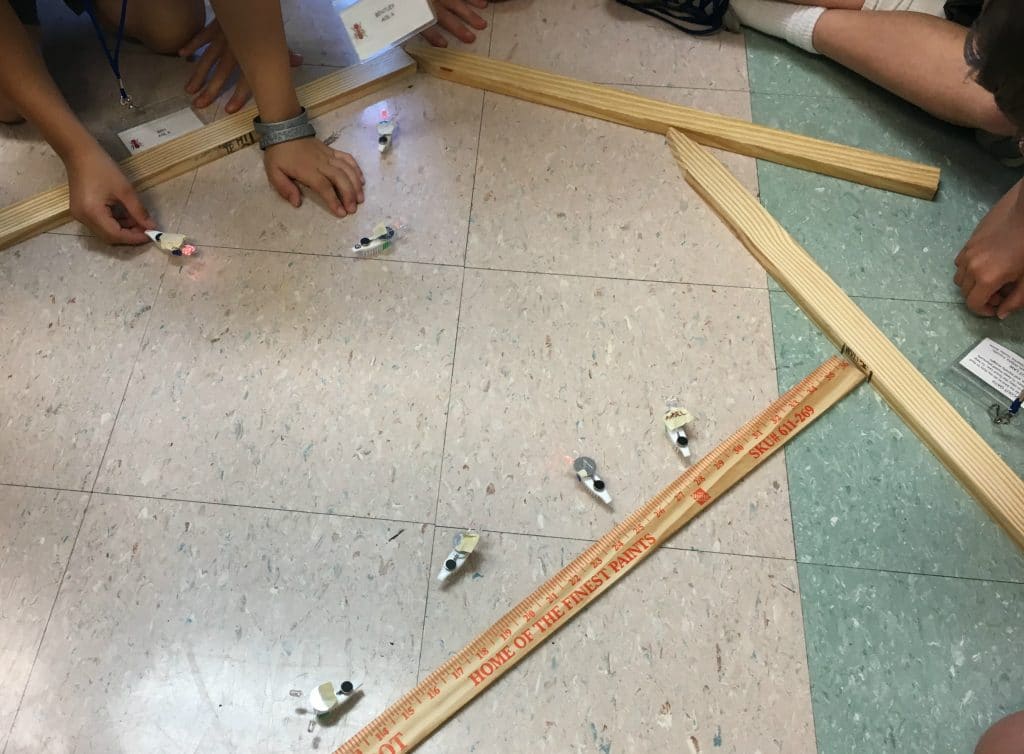
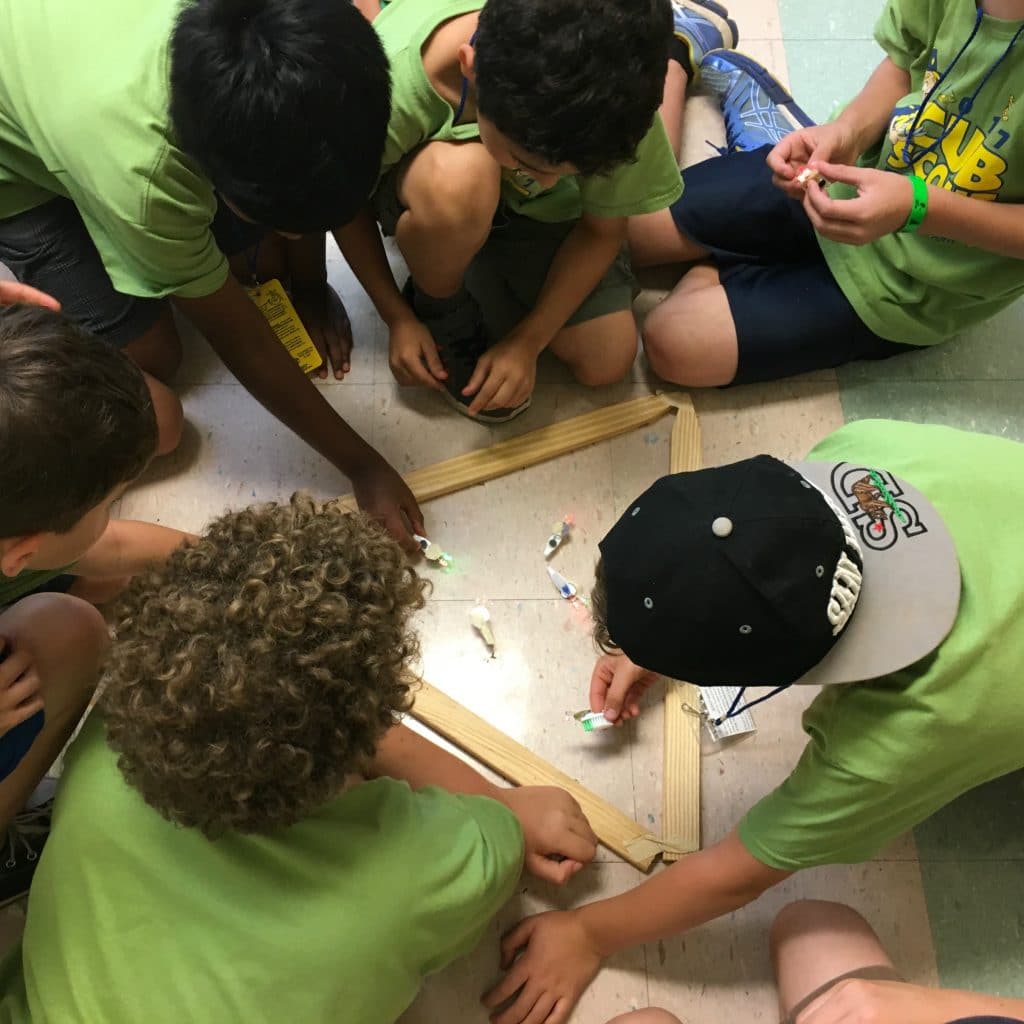
Using yardsticks and lawn stakes, the Boy Scouts built a big arena on the floor. This allowed several Cub Scouts to battle at the same time, and it was awesome! The kids had a blast.
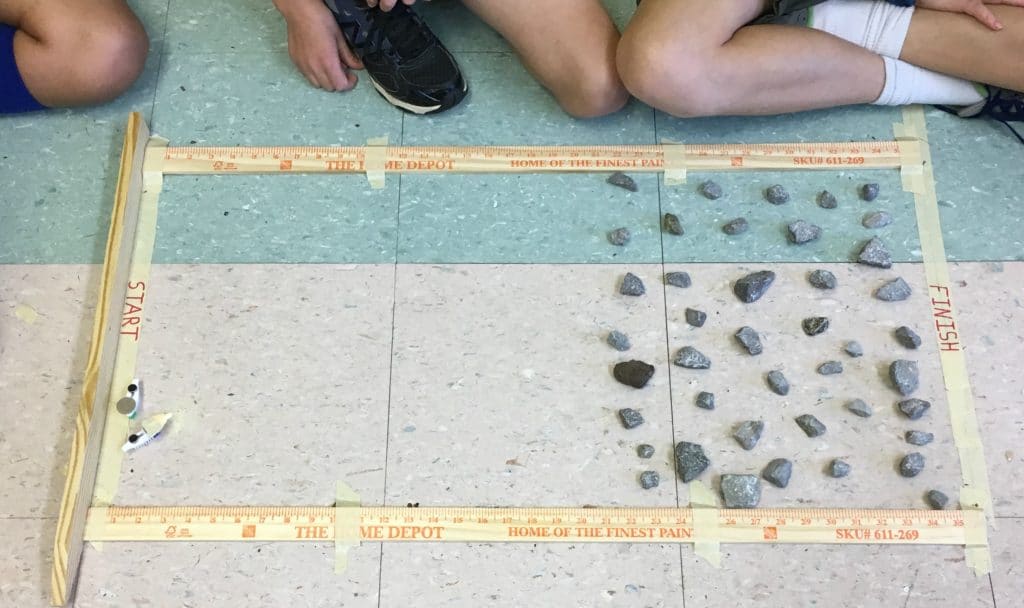
The Boy Scouts also built an epic bot race track. The big twist was that they added quite a few rocks as obstacles. Even if your bot was an inch away from the finish line, you might still lose if your bot bumped into a rock and turned around. It would head back toward the start line!
These additions really made the activity so much more fun! Thanks to Jamie, Eli, and J.B. for these awesome ideas!
ACTIVE TIME15 minutes
TOTAL TIME15 minutes
MATERIALS
TOOLS
- For Preparation:
- Kitchen Shears or Wire Cutters
- Pliers
- Serrated Knife
- Tweezers

INSTRUCTIONS
-
- Cut the heads off of the toothbrushes using kitchen shears or wire cutters.

- Strip some of the plastic covering from the wires on the cell phone motor.

- Peel the backing from one side of adhesive foam pad and stick it onto toothbrush. It should be toward the end of toothbrush back opposite of where the handle was.

- Peel the backing from the motor and stick it onto the back of toothbrush (where the handle was) with the wires facing the foam pad.
- Separate the wires. Bend the positive wire up and gently press the negative wire onto the top of the adhesive pad.
- Place the battery on top of the adhesive pad with the positive side up.
- To add the "eyes", slide the LED bulbs onto the sides of the battery with the bulbs at the front of the toothbrush (the opposite side from the motor). The short “legs” (negative side) should be on the bottom.

- Using painter’s or masking tape, tape the positive wire down onto the battery, and watch the robot go!
NOTES
Use caution when stripping the plastic off of the wires on the motor. It's easy to pull or cut them off.